Showing posts with label DIY. Show all posts

Friday, January 11, 2013

How to Winterize Outfits.

During the winter months, I always hear the same thing from ladies trying to look fashionable but want to stay warm. "This is cute, but I couldn't wear it in winter." Well, I'm going to make a bold statement and say, with the right styling you can wear any pieces anytime of the year, there are just a few guidelines to follow and your favorite summer pieces can become your favorite winter pieces. 

Rule #1: layering
Don't be afraid of a little bulk. Invest in a longer length swingy-style coat that has room for you to layer a sweater, gloves, and scarf on underneath while maintaining a feminine shape. 


For example this coat from asos


Or this femme trench that is on sale in the store.
Underneath these types of coats you can pile little sweaters. These layers will add texture and depth to your look. If you feel like a stuffed sausage, add a belt over your layers to highlight your waist.

If your dress is a trapeze or shift dress go with a longer length sweater, this will keep the line of your dress looking smooth and the proportions right. 
This cream knit sweater is available in the store. 

If your dress is a fit-and-flare shape, go with a cropped sweater or something that highlights the smallest part of your waist.
 Like the Alison Jacket, available in the store and online. 

Then accessorize with a warm scarves like these: 


STEP 2: 

Tights, tights, tights, leggings, tights. Seriously, it's the only way to keep your legs looking warm AND shapely. Neutral colors will keep your legs looking slimmer, but a pop of color can be fun.
Options in the store

Step Three: 
Boots. Boots will keep your feet warm and come in versatile heel heights. If it's extra cold go for a taller shaft, if you can get away with it go for a more hip ankle boot. Don't forget that tall socks will add some extra warmth and texture to taller boots. One hint is that if you keep your tights and boots the same color it will create a continuous line and will give the illusion of longer legs.


These styles are great paired with dresses!  

Here are some style inspiration photos of ladies who know how to winterize summer outfits! 


Wednesday, January 9, 2013

2013 Resolutions!

My big New Year resolution was to start keeping my house tidier! Having a clean house helps me stay stress free and more focused. This blog www.idreamofclean.net has some awesome tips! 

1. Shine Your Sink.

Several years ago I was on the flylady email list and the first thing I learned was to “shine your sink” every night. (Unfortunately, that’s as far as I got with the flylady. Maybe I should try again!) Anyway, the shine your sink concept is a great habit to begin! Every night take five minutes to clean your kitchen completely. Put dirty dishes in the dishwasher, clean off the counters, and scrub and dry your sink until it’s shiny.

2. Wash One Load of Laundry Daily.

Instead of waiting until the weekend to wash several loads of laundry, get in the habit of washing one load every day. As soon as you wake up, put a load of laundry in the washing machine. As soon as it’s finished (that’s the hard part for me!), transfer the load to the dryer. Hopefully it will be finished by the time you leave for the day! When you get home, fold and put away the clothes.
You may need to modify the routine if you’re worried about your clothes getting wrinkled or you have more or less than seven loads of laundry every week. Just make adjustments and find a way to make laundry part of your daily routine.

3. Process Mail Immediately.

Go through your mail daily. As you walk in the door, open all envelopes, throw away or shred junk mail, and put bills and other action items in your command center.

4. Create a Command Center.

A command center is an area in your home that can be used as a catch all for items that need to be processed (i.e. bills that need to be paid, cards to send out, etc.). It’s also a place that can house items that need to be picked up quickly as you walk out the door like keys, bags, and phones. Some also benefit for having a calendar in this area. Customize the command center to fit your family and life!

5. Throw Away Trash.

Throwing away your trash seems so simple right? But, how many times have you (or someone in your family) taken something out of a package and put the package on the counter beside you? Or, maybe you’ve taken tags off clothes and just placed them on the dresser instead of the trashcan? Instead of waiting until later, just take a few extra seconds and immediately throw away trash in the trashcan.

6. Straighten Up Every Night.

Waking up to a clean home can make the start of your day more pleasing and productive. Take a few minutes each night to pick up around the house. It doesn’t have to be spotless, but straightening up nightly helps to keep the mess from becoming overwhelming.

7. Create a Cleaning Schedule.

Depending on your personality, a cleaning schedule can be as detailed or scaled down as you want it. You may want to clean bathrooms on Monday, mop and vacuum floors on Tuesday, dust on Wednesday, cut the yard on Thursday, and something else on Friday. Or you may prefer to do everything on the weekend. In either situation, a plan will help you move through the list much more quickly. Just like other areas in life, a plan will encourage, motivate, and enable you to reach your goal for a clean home.

8. Become a Minimalist.

Reducing clutter reduces stress. You’ll have less to clean, less to pick up, and less to maintain. You may even be able to live in a smaller house! Or at least not feel like you have to move into a bigger one.

9. Do One Thing.

Sometimes the list of household projects can seem so overwhelming. If you have a list of 10 things that you need to replace, build, or update, just pick one thing to complete. Then do one thing that will move you closer to finishing that project. For example, if you need to organize your closet, start with your pants. Then move onto skirts the next day, and tops the following day. Break down a large project by just doing one thing. More examples can be found in my Do One Thing series.

10. Have a Junk Drawer.

Yes, a junk drawer is a must for a clean home. In some cases, a cabinet or closet may be more reasonable! Having a place to store random items that don’t have a home can be so freeing. Plus, when you’re in a hurry, sometimes it’s just easier to dump everything into one place. Of course, the only downfall is that you must clean it out periodically!


Wednesday, September 12, 2012

Autumn Ideas


When the weather starts to change, it makes me look forward to fall! Which means winter fruit like oranges. Here's an idea I saw on Pinterest to make dark chocolate dipped blood orange slices and sprinkle them with sea salt! yum! 


Wrap your tea lights with cinnamon sticks to create cinnamon flavored candles! 


Make a Potpourri! It will make your home smell warm and wonderful. Recipe here


Sunday, August 19, 2012

Misc. Meggie

I am an avid internet surfer. I'm always looking for beautiful images or to be inspired because of this I always end up with a MISC. folder of images and ideas that I hope to someday do something with. These images may be fragments of a blog idea I once had that has since disappeared, or just something that made me sigh. So I thought I would dump all of these mis-matched images into a post for everyone to enjoy! 


Friday, July 20, 2012

DIY Necklace Display

Lately I have been collecting small, fallen tree branches from Golden Gate Park for some crafty project ideas. I had the idea of converting a tree branch into a jewelry holder for my bracelets and necklaces. Here's what I did:  


My original branch was beautifully Y shaped but it was too long for where I wanted to place it, so I broke it in half. Then I painted it with acrylic craft paint in a striped pattern.


When the paint was still a little wet, I rubbed a wet towel over the branches to give the paint a more distressed/faded look. Then I glued on some bits of lace and let it dry overnight.  


After a frustrating hour of trying to hammer nails into the branch, I finally just hot glued the two big sticks together and tied them for more support. Then I gathered a small stick from outside, cut them into little pieces, and glued them onto the bigger branches to create little, faux wood nibs. I suppose I could have just hung my necklaces around the actual branches, but I wanted a faster way to select jewelry.  


I placed two command hooks on the wall (I'm a renter!) and moved the branch into the hooks until they were wedged in a tight spot. I'm really happy with the result. I love the natural/hand-made look of it and how pretty my jewelry looks! 

Sunday, July 8, 2012

Wedding Inspiration: Ojai, CA

This weekend I had the pleasure of driving down the coast to go to a BEAUTIFUL wedding in Ojai, California. Driving down the 1 was absolutely breathtaking! I swear, you could get out of the car every 10 minutes to take in the view.


But now to the wedding! This was an absolutely gorgeous, personalized, DIY outdoor wedding. I am a huge fan of making weddings feel like the couple, and this couple nailed it! Here's a few of the personal touches that made the day so special!


The ceremony and reception took place outdoors. There were palm trees and foliage everywhere, swooping and hanging to make the perfect jungle canopies. Lanterns, twinkle lights, and shells were adorned everywhere!


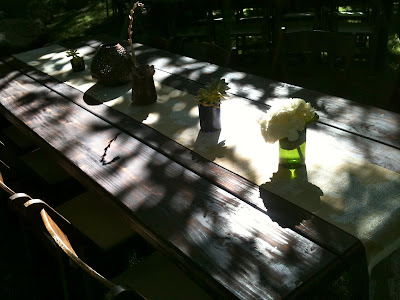
Scattered among the trees were mason jars filled with stones and tea candles. The tables were covered in cut wine and beer bottles, filled with succulents and hydrangeas. 


I love cozy furniture outdoors, and this was such a perfect little lounge area!


The "guest book" was a tall recycled glass vase from Spain. The Bride and Groom filled baskets with card stock, sea shells, and even souvenirs from their trips to Joshua Tree! They asked everyone to write a note on any of the objects and place them in the vase.


The happy couple! 


After the ceremony, everyone gathered around the pool area to have beer, wine, and appetizers. How cute are the mason jars for serving beer? I especially loved the personalized koozies representing the place where the Groom proposed! 


The rest of the night was filled with food, music, dancing, laughter, and so much happiness and love! It was a beautiful night under the palm tree canopies and stars!